Welcome to the Maria’s Discoveries brag blog!
Hi there. I guess it’s official – I’m one of those annoying people with a blog! Here’s the reason: I have a little e-commerce business that I started and I want to see what everyone is making out of the craft supplies, fabric, patterns, and everything else I am selling. And I’ll bet they would like to see what my other customers are making too.
Since I have no idea what I am doing, I expect to mess this up like crazy until I get the hang of it. So I’ll start with one of my own projects.

If you’ve bought something from me, you may have noticed that I like to ship things to customers in little handmade gift bags. It’s kind of silly, but I like my customers to get a pleasant surprise when they open the mail.
These gift bags are a piece of cake to make, and they’re a nice way to show that I care.
The Goodwill store near my home sells a LOT of used dust ruffles. Sometimes they are in near-perfect condition, and sometimes they look like they got stuck in the vacuum cleaner and then eaten by a dog. That’s OK by me!
The reason I like to use dust ruffles is that they are generally made up of about a mile of hemmed, 12-16 inch high-quality fabric. And also, they’re cheap. 🙂
I especially like the ruffled ones because they have more fabric. Here’s how I do it:

This is a perfect dust ruffle: huge bed size, beautiful fabric, very cheap!
We are going to use the patterned material (the “drop”).

Flip your dust ruffle over to the back and look at where the drop is attached to the platform. Many times, the platform is that cheesy fake fabric they use to make grocery bags. Sometimes, you get lucky and it’s high-quality 100% cotton muslin. This is a middlin’ platform. It’s real fabric, and I’ll use it for SOMETHING, just not today.

You will need to cut the drop just before it attaches to the platform. You can use scissors or a rotary cutter. A rotary cutter is faster, but today I’m using my scissors. I like to use my sewing scissors when I am home alone because they are the only scissors in the house that work. Shh. I’m not going to tell you where I hide them!

Once you cut the drop off, you will have a lot of hemmed fabric, about the height of your gift bags! The fabric gets flipped over, so the nice hem is at the top.

Now cut your drop fabric into rectangles as big as you need. Look out for stains, snags, holes and the like. The dust ruffle I used this time was HUGE because of all the pleats, and so I got enough for 24 bags!
Most patterns are about 6 inches wide and 8-1/2 inches tall. You will want your width to be at least double the width of your item to be wrapped, plus at least 4 inches. I usually make it a little wider than necessary because that way, I can cut and sew like a slob.

Fold your fabric rectangle in half with wrong sides facing each other. (Right sides out.) This is not how we usually sew, but we will be making a french seam for the gift bag. It looks all fancy, but the real reason I like to use a french seam is that french seams are faster than zigzagged edges.
It seems like the right time to say this: A 4-H blue ribbon champ would press his or her fabric before doing this, and also press the bag at many points during construction. I don’t sew that way. Having an iron and/or ironing board out would be a major safety hazard at our house, so I just focus on my own niche. Some people sew well, and they amaze me. I sew FAST. That’s my niche. 🙂
After you’ve folded the fabric, sew the side edge of your bag. If you did a great job of cutting and everything is nice and even, you can make it 1/4 inch seam allowance. If you cut it all crooked, you will need to make it a little wider to make sure you don’t have any crooked parts crossing into your seam.
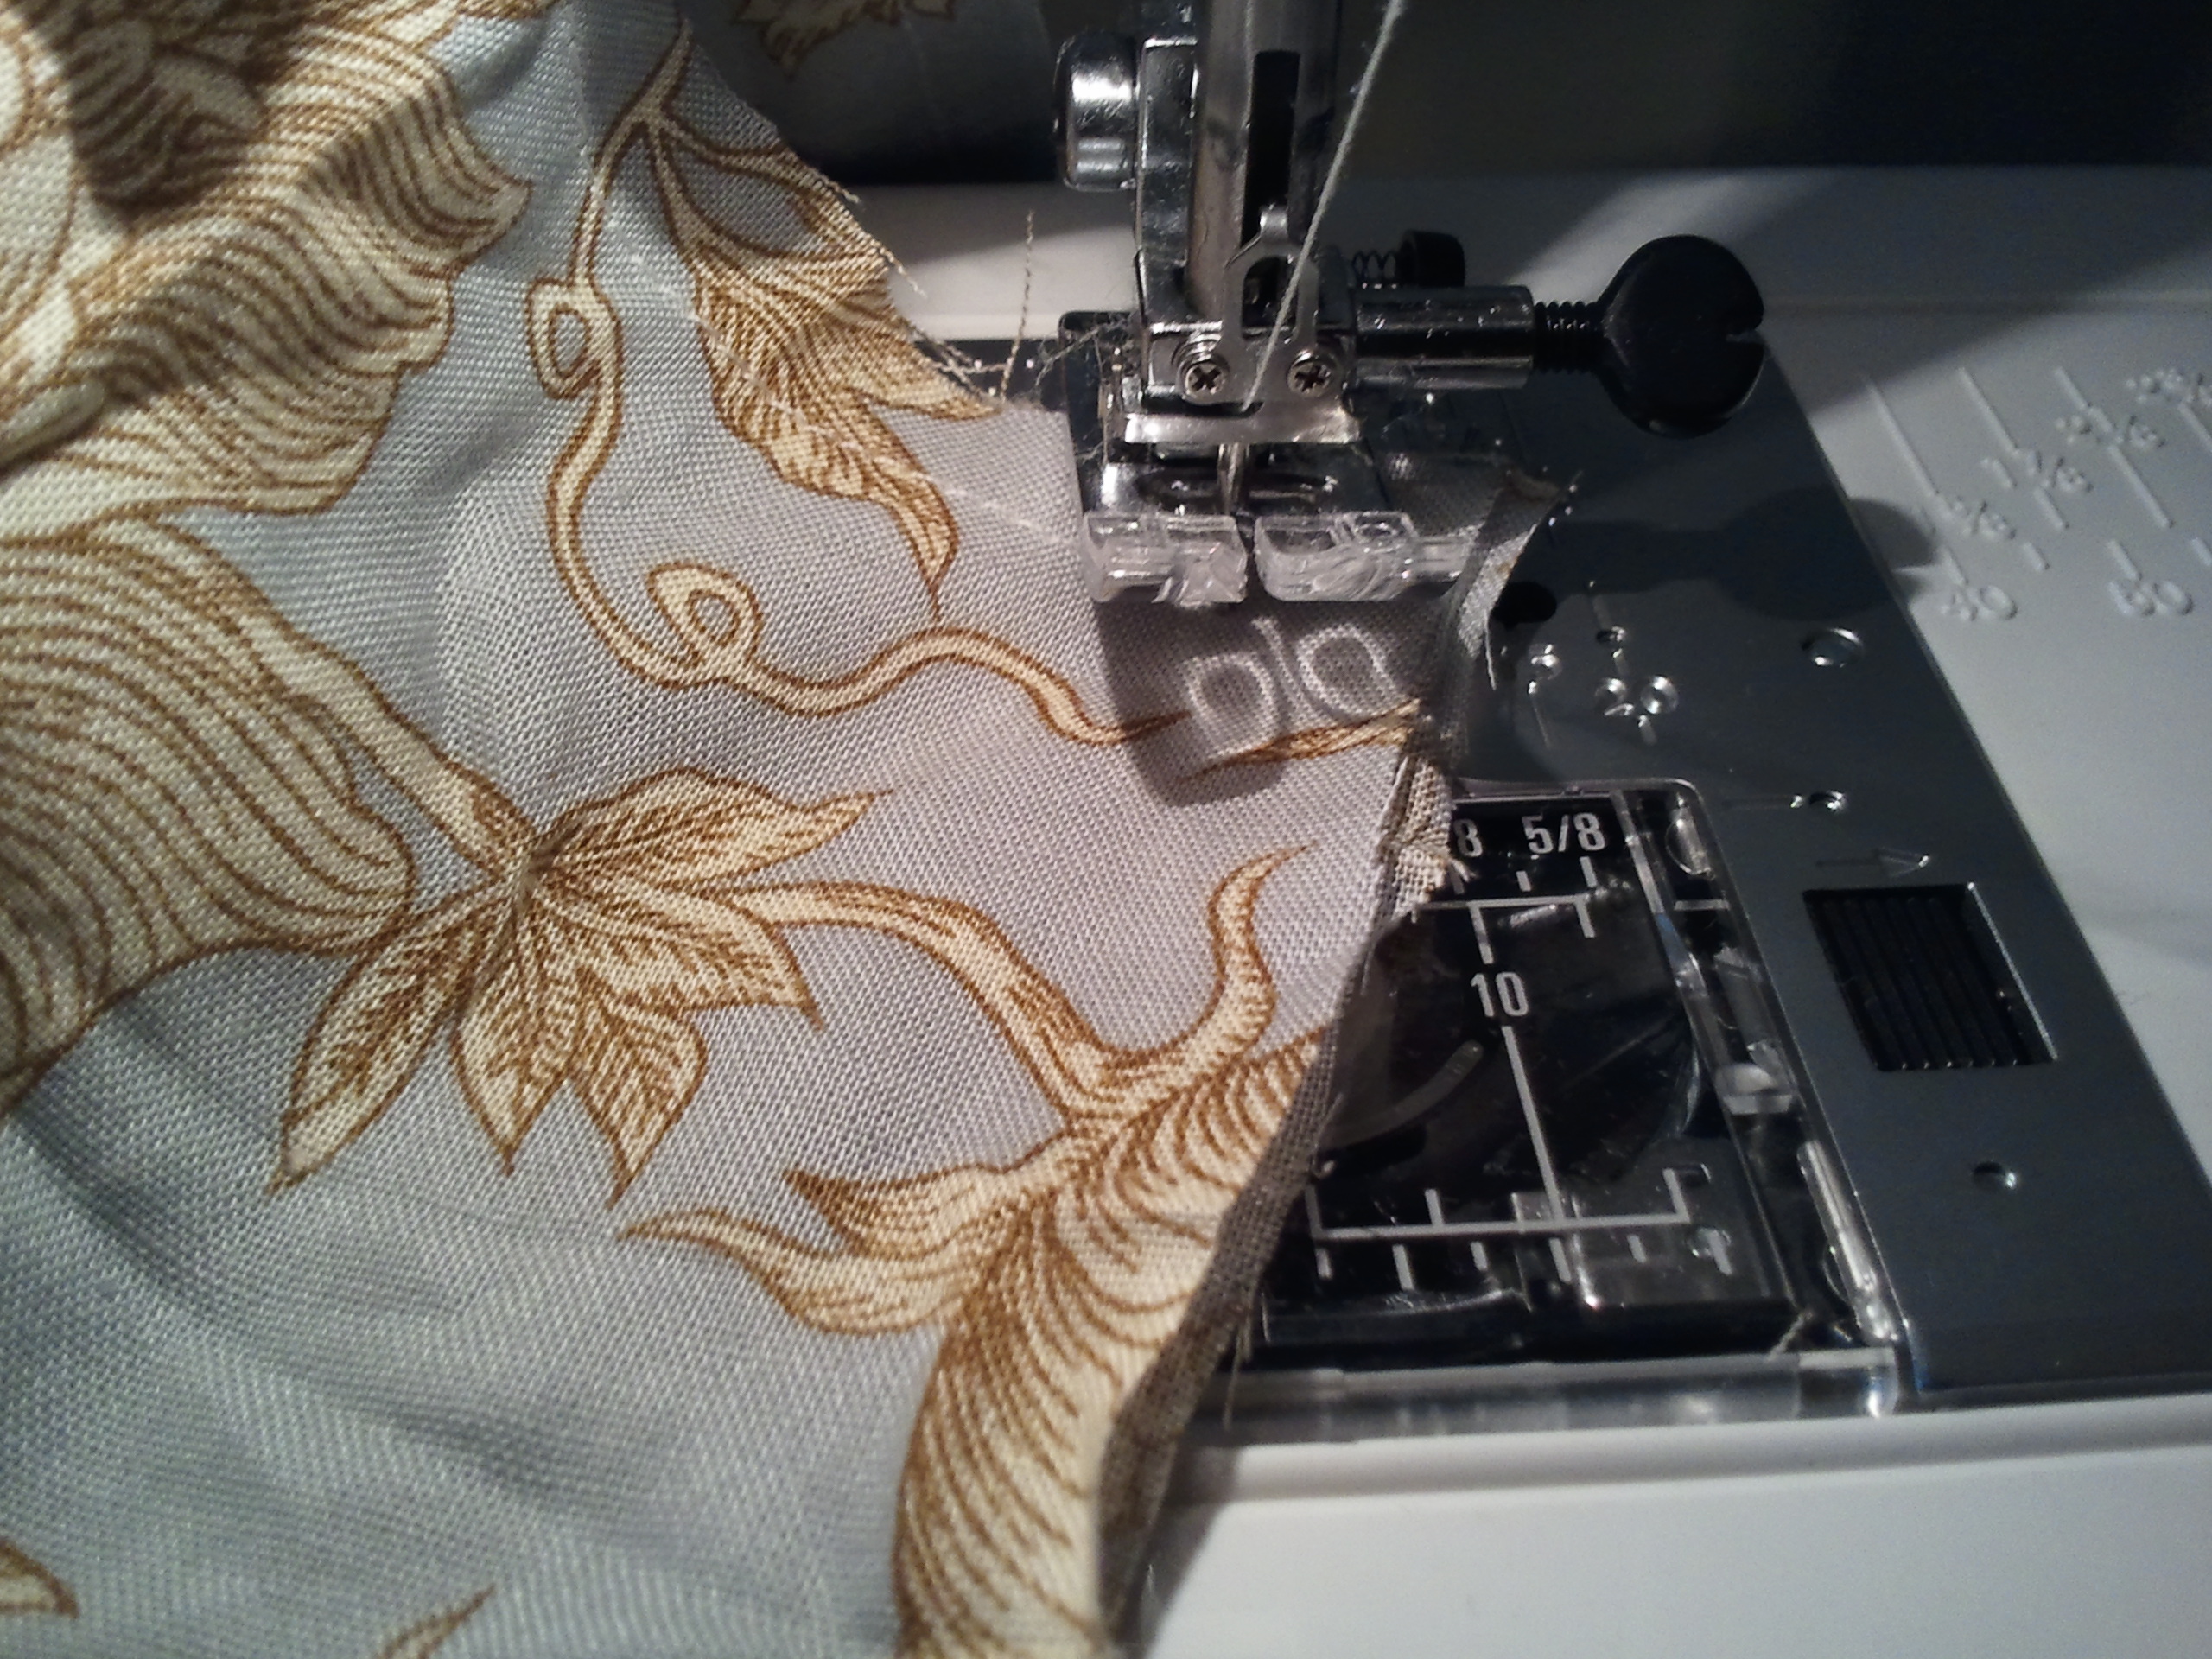
Sew all the way down the side of the bag until you are almost at the bottom. Leave the needle down and lift your presser foot. Swing the fabric around 90 degrees and drop your presser foot again. Sew all the way across the bottom. This will be the bottom of your bag, and it’s the edge you cut away from the platform of your dust ruffle. If you’re like me, you will need a wide seam allowance here. 🙂 I got a little wacky with the scissors when I was cutting through all those pleats!


Back stitch just a bit at the end, then snip your threads and you’re ready for the french part!


Next, you get to hide the evidence if your earlier cutting was crooked. You need to trim the seam allowance to about 1/8 inch, and snip the corner too.

Now you can turn your bag inside out. Poke the corners with your fingers so they look nice and neat. Blue-ribbon champs, you will probably want to iron the bag about now.

This might be the best part: the ribbon! I have used many different kinds of ribbon, depending on what I have on hand and how I want my bag to look. I love grosgrain ribbon, and I also sometimes use narrow satin ribbon, satin rattail cord, t-shirt yarn, whatever! For this bag, I am using 3/8 inch grosgrain ribbon. Cut about a 24 inch piece of ribbon, and then fold it in half.

Tuck the fold of the ribbon into the seam allowance of the bag about 3 inches from the top, and pin it.

Now you are ready to stitch again.

Stitch near the same path you stitched earlier, this time using about 1/2 inch seam allowance. You will be making a little tunnel, with the unfinished edge encased in the tunnel. That’s a french seam. Very fancy. Very, very fancy.

Don’t forget to pause and take out your pin before you sew over it. If you hit the pin, you could break your needle and put your eye out!

When you get close to the bottom of the bag (about 1/2 inch), do the same maneuver as last time: keep the needle low, lift your presser foot, swivel the fabric 90 degrees, drop the presser foot and run the seam all the way to the end.


When you get to the end, back stitch a little bit and then snip your threads.


Turn your bag again and poke out the corners with your finger. BRC crafters, go iron it again.

If you are using grosgrain or medium-to-wide satin ribbon, it looks nice to trim the ends. Fold the ribbon in half…

…and snip it at an angle.

Oooh, fancy!

Now we’re ready to wrap!

There we are – all finished!
I hope you enjoyed learning how I make my bags. I’d like to see what you are making too. If you would like to submit photos of whatever you’re making, please send me a message. I don’t know how yet, but there’s probably a button on this page somewhere…
Thanks for reading!
Maria
BRC stands for Blue Ribbon Champion. This is not to be confused with BRK, which is what a chicken says.

Oh, Maria, you are the best! Love your tutorial.
Mother Theresa
LikeLiked by 1 person
Aw, thanks, Mom! I learned from the best!
LikeLike
Love it! And I must say, your nails are quite impressive, too!
LikeLiked by 1 person
Thanks, Barbara! I must have somehow gotten too busy for nail-picking. 🙂
LikeLike
[…] nylon something-or-other fabric I picked up at the thrift store. I made it like I make my little gift bags. I used one of the fabric selvages for the top so I wouldn’t have to hem it. I’m […]
LikeLike
[…] If you want to make your own, here’s a tutorial. […]
LikeLike
[…] was a tiny bit more work than my usual bags, which is still not much work at […]
LikeLike